Publishing a Swift Package

This article is the third post in a series about SPM. If you don’t know what a Swift Package is, I recommend you to take a look at the first and second articles. Today we’ll explore how we can publish and version a package.

Centralized vs. Decentralized

Dependency managers can have two different strategies for organizing and fetching their packages. They can be centralized or decentralized.

A centralized dependency manager has a central place where all packages are located. It then uses this place to fetch a dependency. The advantage of this approach is that it offers easy discoverability (e.g: a website we can use to search for dependencies).

A decentralized dependency manager doesn’t have a specific place containing all registered packages. It allows dependencies to be published independently, requiring us to inform their URL to fetch them. The advantage of this approach is that it doesn’t rely on a single source, which makes it more flexible and resilient to failures.

Git usage

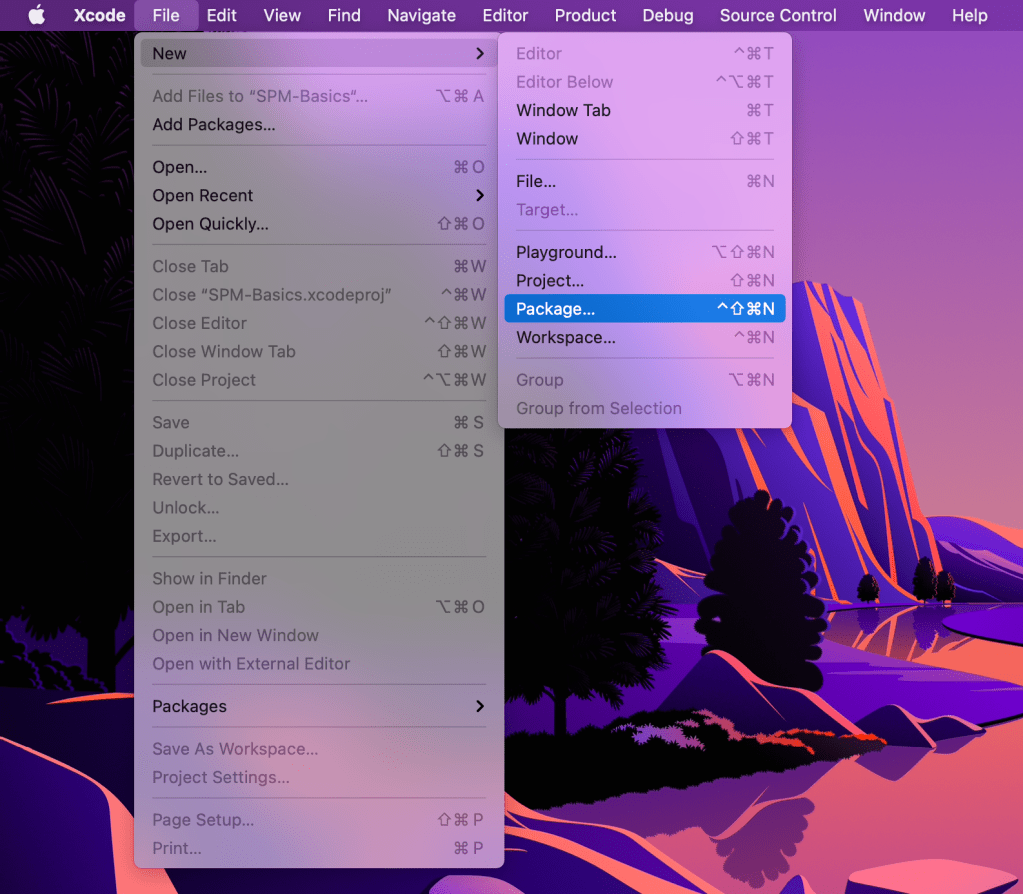
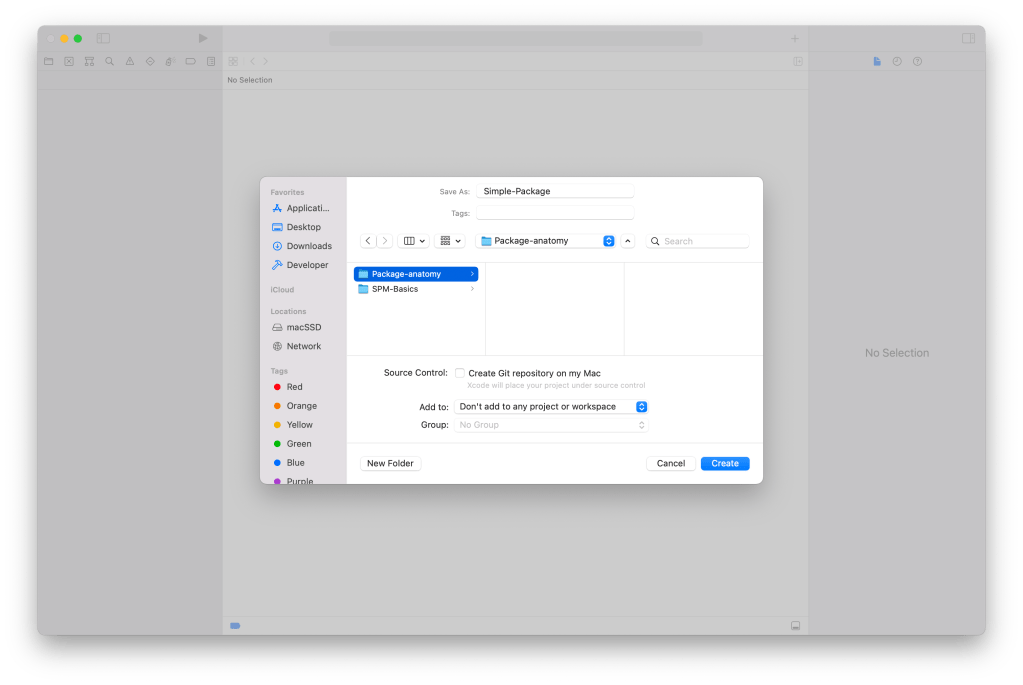
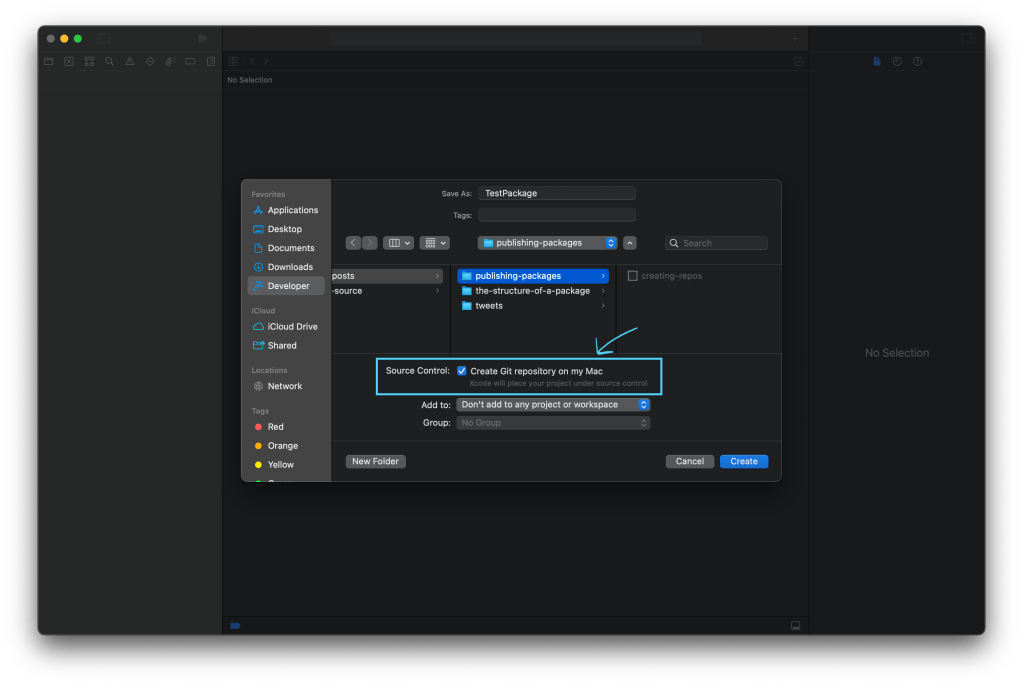
SPM is decentralized, and makes heavy use of Git. Xcode offers an option to initialize a local Git repository when we create a package:

You can initialize the git repository when creating a package.

It also adds an initial commit for us:

The initial commit Xcode added for us.

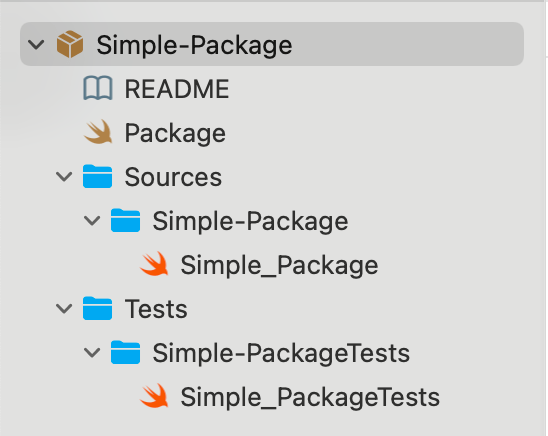
The default folder structure even comes with the README.md and .gitignore files (notice we also have the .git folder for our local repository):

The listed files under our package folder.

Creating a remote repository

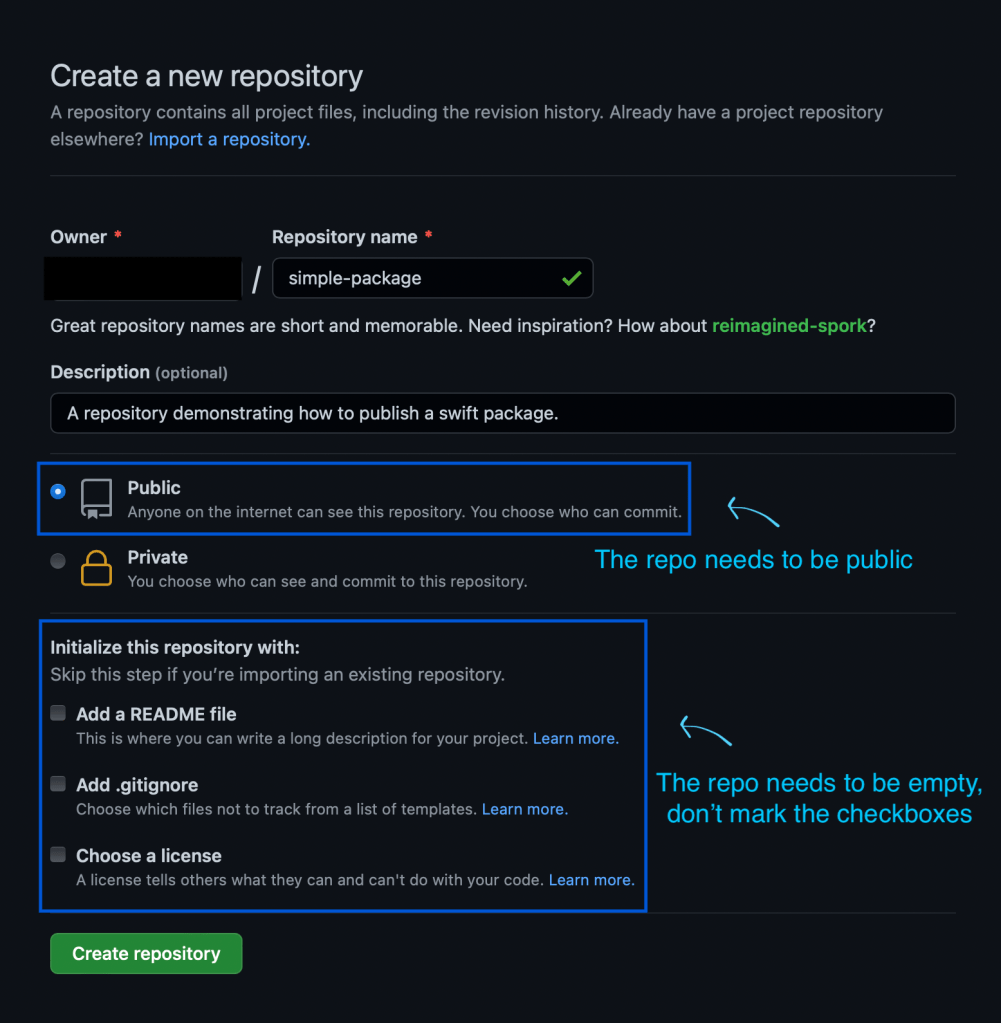
To publish a package, all we need to do is create a remote Git repository and push our local package commits to it. SPM will then be able to fetch the package. We’ll be using Github, but we can publish a package to other Git servers as well.

When creating the repository, make sure you mark it as public and that it’s empty (doesn’t include a README.md or license):

Creating a repository on Github.

Once the remote repository is created, we need to configure the remote inside our package:

Configuring a remote.

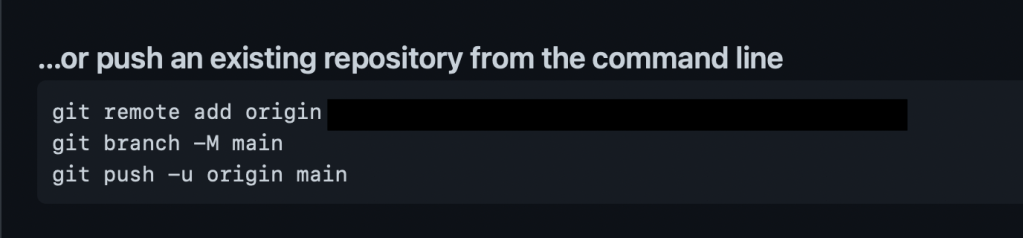
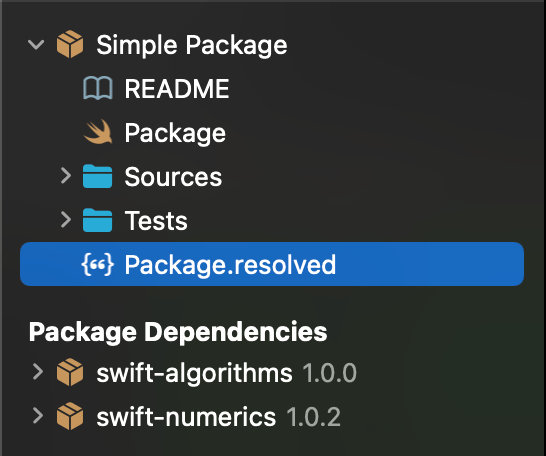
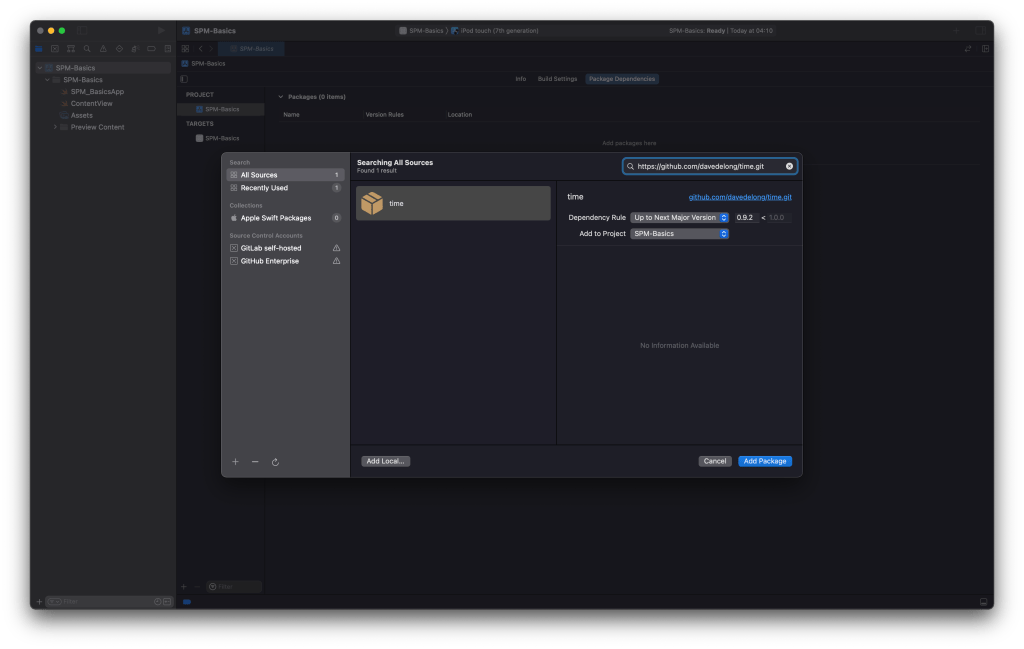
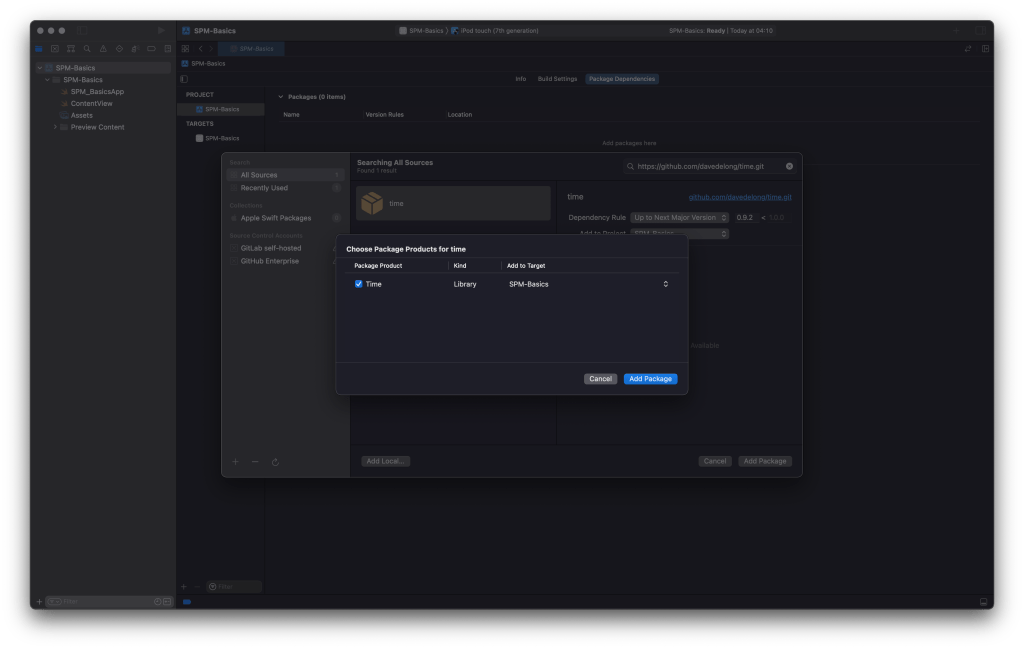
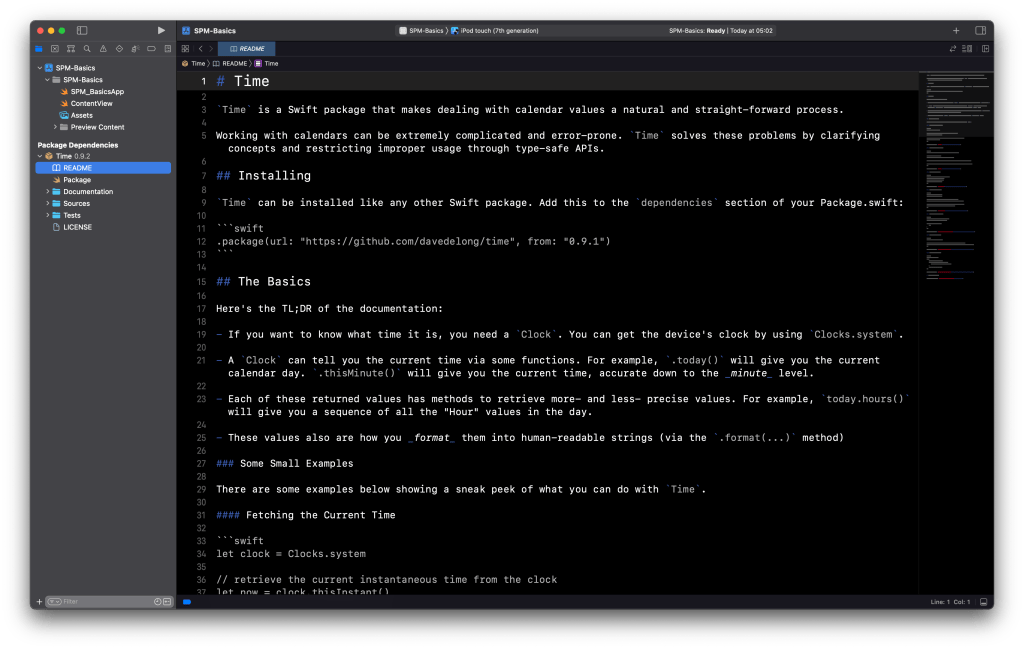
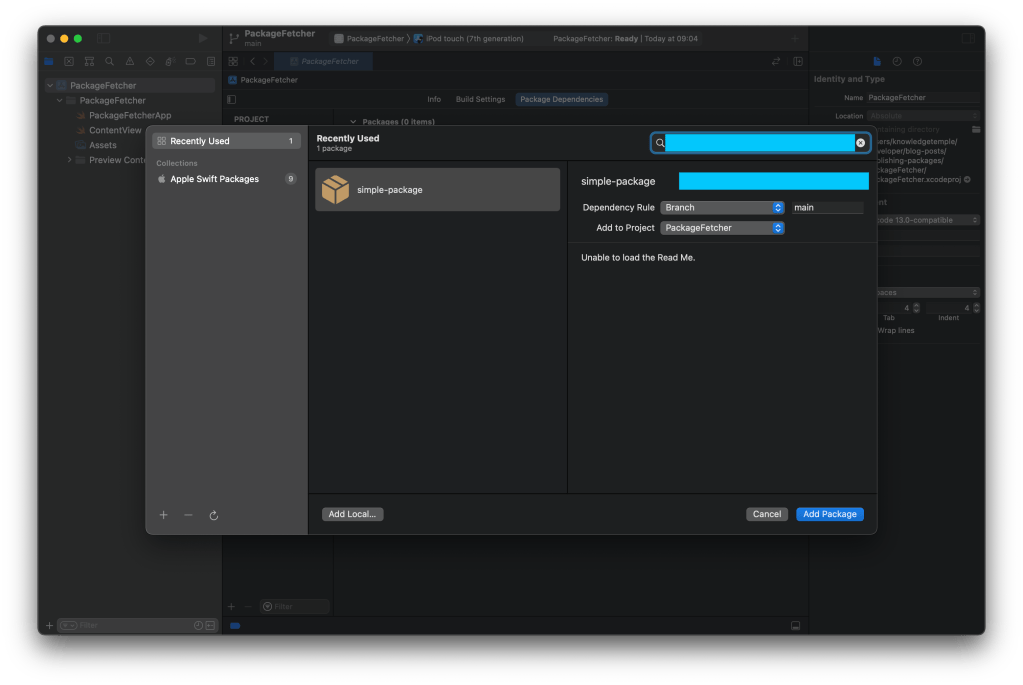
After we push our local commits, we can use the repository URL to fetch the package:

Fetching our package.

Private packages

It’s pretty common to develop and use private packages. They belong to a person or organization, and are shared internally with multiple apps or packages. Their publication process is the same, but the repository is private.

To fetch private packages, we need to configure how we authenticate to the Git server we’re using. SPM will then be able to access our private repositories. There are two common protocols we might use: HTTPS and SSH.

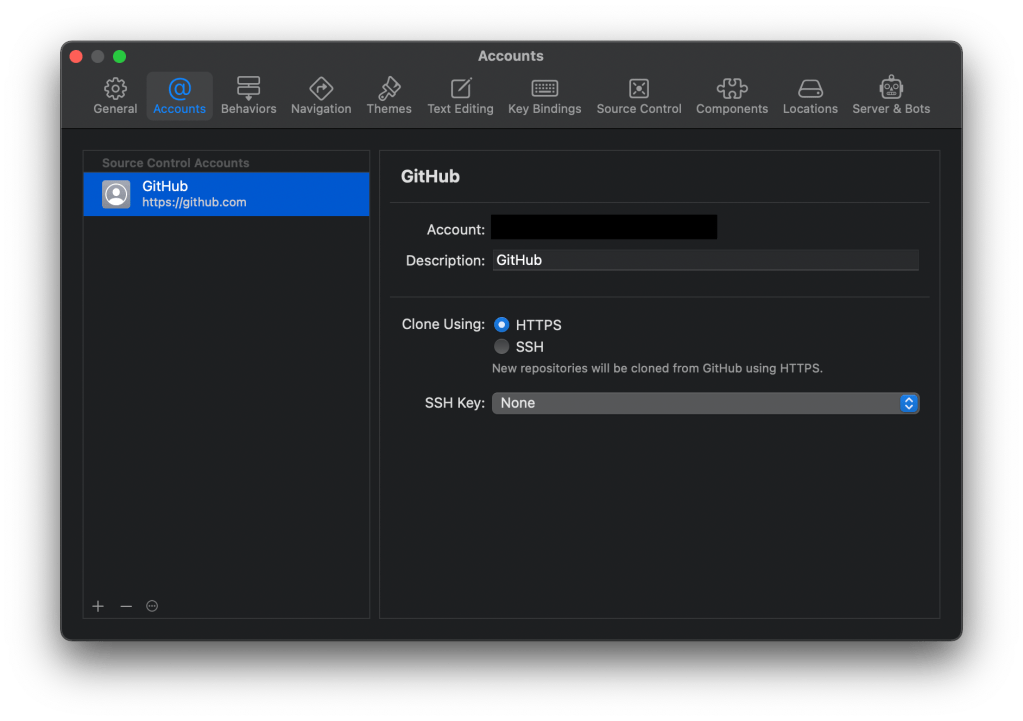
To setup authentication, we first need to configure a Github account in the preferences panel (preferences -> Accounts). Xcode will require a personal access token. To get one, follow the steps in this link.

Accounts panel: preferences -> accounts

HTTPS

Authenticating with HTTPS is simple. Once we have the account in place, we need to ensure it will clone the repositories using this protocol:

A Github account using HTTPS.

SSH

SSH is more complicated to be configured. This link explains it in detail. When creating the keys, make sure you don’t use the ssh-ed25519 encryption algorithm, because it’s unsupported (we need to use RSA instead):
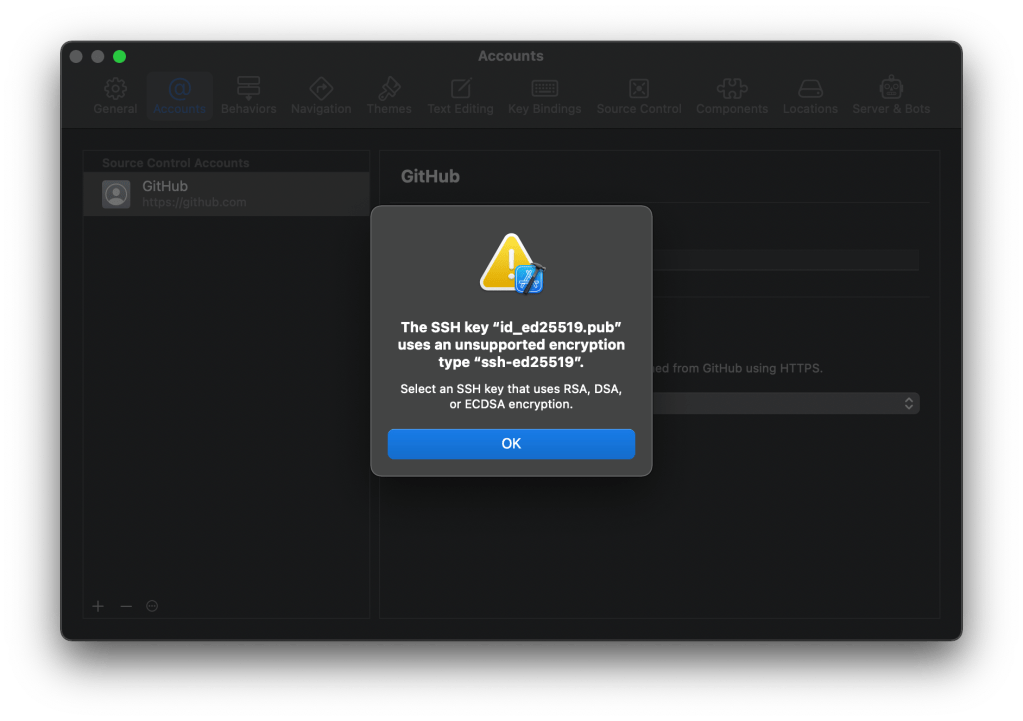
Don’t use the ed25519 algorithm.
Use 
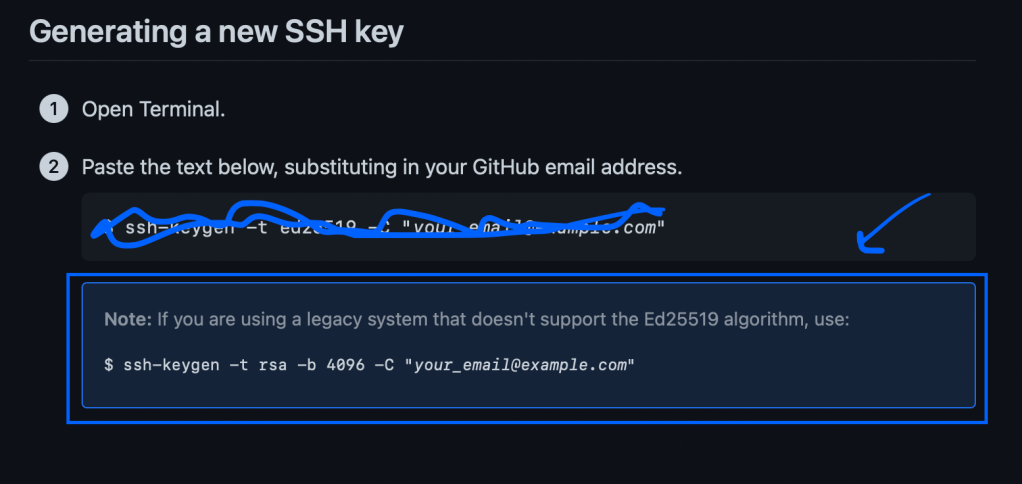
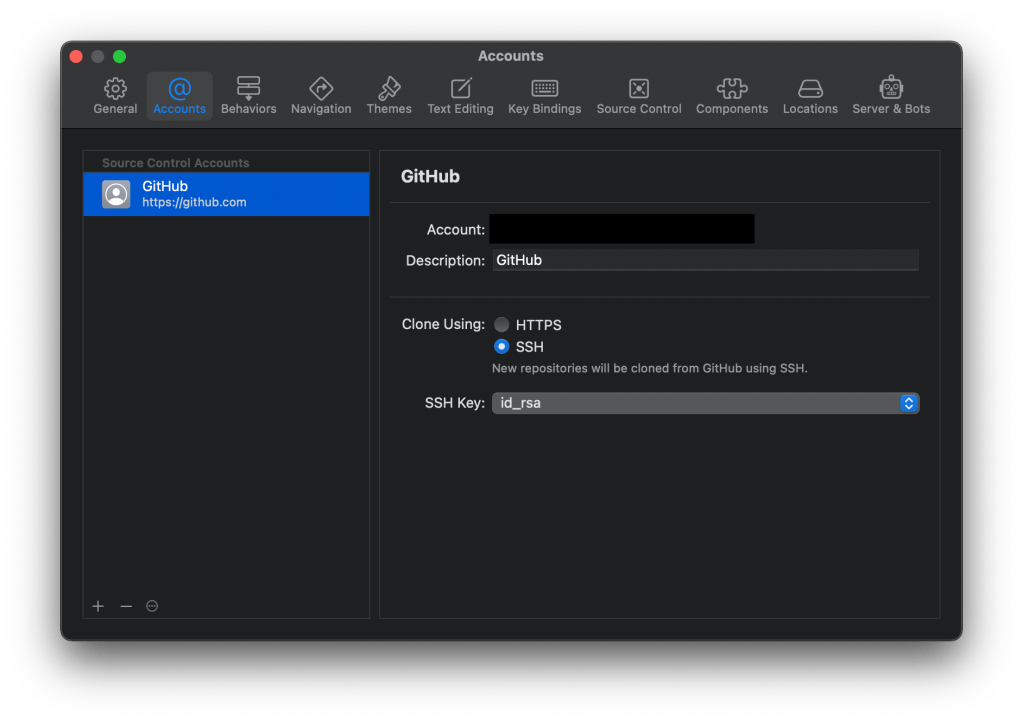
RSA instead. The instructions are in this link.

Once we have SSH setup, we need to configure our Xcode account to use our private key. Notice that we also need to clone using SSH:
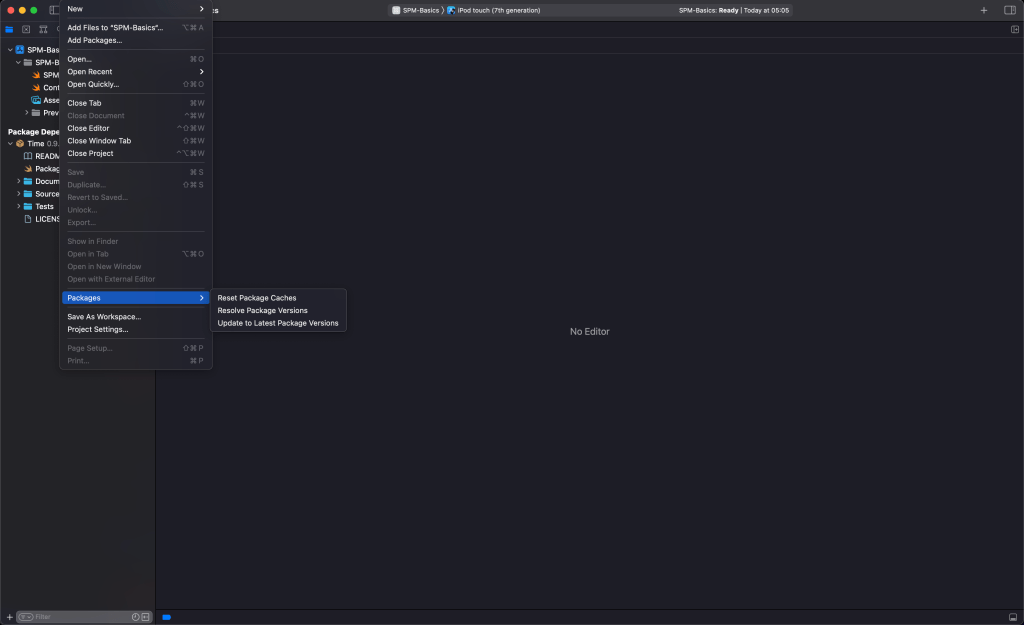
Configuring the account to use ssh.

Versioning

Once we publish our package, we need to ensure its clients receive updates. SPM uses git tags to mark the versions of a package, and we use semantic versioning to organize them. We release a new version when we want the clients to receive a change. It might be a bug fix or performance improvement, for example.

The workflow for releasing a new version is pretty simple:

# To list our versions:
git tag

# To create a local version:
git tag -a major.minor.patch -m "tag description"

# To publish a version:
git push origin major.minor.patch

# To remove a version already published:
git push origin --delete major.minor.patch
git tag -d major.minor.patch

To summarize

  • SPM makes heavy use of Git
  • We can initialize a Git repository when creating a package
  • To publish a package, push its local changes to a remote repository
  • To fetch private repositories, configure the Xcode account with either HTTPS or SSH
  • Use git tags to manage the versions of a package

Versioning packages is an important topic that deserves attention. In the upcoming article, we’ll look into it in more detail.

The structure of a Swift Package

In the previous article, we talked about what SPM is and how we can use it. We briefly talked about packages, but we are missing a key point: how to create them. In this article, we’ll explore packages in more detail. If you don’t know what a package is, I recommend you first check the previous blog post before continuing.

Creating a package

We can use Xcode to create packages (in this article I’ll be using version 13.2.1). With Xcode running, Let’s go to File -> New -> Package:

Selecting the package creation menu.

Selecting this option will open the following window:

Package creation screen in Xcode.

Once we are good with the location and name of our package, we can click the create button, and SPM will create our Swift package with a default folder structure.

Folder structure

The folder structure of our package.

When created, a package comes with a default folder structure. Each file and folder has a purpose:

  • README.md: Describes the package to humans
  • Package.swift: A manifest file defining what the package is
  • Sources: Folder containing the source files of our package
  • Tests: Folder containing the unit test suites covering the code from the Sources folder

The manifest file

Every Swift package has a manifest (named Package.swift) identifying it. A manifest contains important information about a package:

  • Its name
  • The platforms it supports
  • The targets it consists of
  • Its dependencies
  • The products it distributes (libraries)

SPM uses this information to manage our packages. The following code comes from our Package.swift file:

// swift-tools-version:5.5
// The swift-tools-version declares the minimum version of Swift required to build this package.

import PackageDescription

let package = Package(
    name: "Simple-Package",
    products: [
        .library(
            name: "Simple-Package",
            targets: ["Simple-Package"]),
    ],
    dependencies: [
        // .package(url: /* package url */, from: "1.0.0"),
    ],
    targets: [
        .target(
            name: "Simple-Package",
            dependencies: []),
        .testTarget(
            name: "Simple-PackageTests",
            dependencies: ["Simple-Package"]),
    ]
)

Let’s understand the most important attributes of a package:

Targets

A package is divided into targets. They are the building blocks of a package. Each target has a specific purpose and defines its module:

targets: [
    .target(name: "Simple-Package", dependencies: []),
    // More targets can be defined here.
]

Targets have their own folder under Sources, containing their source code. They can also depend on external code or on other targets as well. This allows us to modularize our code if needed.

Test targets

We can write and run automated tests for the code contained in a target. All we have to do is define a test target with the corresponding folder and test suites (notice how it uses our Simple-Package as a dependency):

targets: [
    // ...
    .testTarget(name: "Simple-PackageTests", dependencies: ["Simple-Package"])
]

Products

The module defined by a target isn’t directly accessible to the clients of a package. It is initially internal. The only way to distribute the public API of a target is to define a product of the library type. It vends the module defined by its target, allowing the clients to use its public API via import:

products: [
    .library(name: "Simple-Package", targets: ["Simple-Package"]),
]

Dependencies

Packages can also depend on other packages. When we declare dependencies, we specify which versions we want:

dependencies: [
    .package(url: "https://github.com/apple/swift-algorithms.git", from: "1.0.0"),
]

Right after we edit our manifest, SPM will resolve our dependencies, the same process it does on a regular Xcode project:

The resolved dependencies (swift-algorithms depends on swift-numerics)

We can then use any products from swift-algorithms in our targets:

/// ...
.target(
    name: "Simple Package", 
    dependencies: [
        .product(name: "Algorithms", package: "swift-algorithms")
    ]
),
/// ...

Workflow

The workflow for packages using Xcode is pretty similar to the one for regular projects (e.g iOS or MacOS).

Adding files

To add swift files to a target, simply place them inside its folder. This file will then belong to the target’s module, which means we can add new code to it and access the other code already defined in there.

Adding a file to the `Simple Package` target.

Building and testing

Building is pretty simple. Just select the product from the list and build it. I’ve added some targets and products to exemplify:

Selecting a product to be built.

Here’s how the manifest looks like:

// swift-tools-version:5.5
// The swift-tools-version declares the minimum version of Swift required to build this package.

import PackageDescription

let package = Package(
    name: "Simple Package",
    products: [
        .library(
            name: "Simple Package",
            targets: ["Simple Package"]),
        .library(
            name: "Library1",
            targets: ["Target1"]),
        .library(
            name: "Library2",
            targets: ["Target2"]),
        .library(
            name: "Library3",
            targets: ["Target3"]),
    ],
    dependencies: [
        .package(url: "https://github.com/apple/swift-algorithms.git", from: "1.0.0"),
    ],
    targets: [
        .target(
            name: "Simple Package",
            dependencies: [
                .product(name: "Algorithms", package: "swift-algorithms")
            ]),
        .target(
            name: "Target1",
            dependencies: []),
        .target(
            name: "Target2",
            dependencies: []),
        .target(
            name: "Target3",
            dependencies: []),
        .testTarget(
            name: "Simple PackageTests",
            dependencies: ["Simple Package"]),
    ]
)

We also have to define the folders for each target:

The new folder structure in Sources.

Conclusion

We’ve learned how to build packages and what they look like in terms of structure. We explored what manifests are and how we can use them to define a package. We also looked at the key components a package has:

  • Dependencies
  • Targets
  • Products

The package we built doesn’t have any source code, just meaningless files. I encourage you to look at real-world examples, like the Time package we used in the previous post or the Algorithms package we used in this one.

In the next article, we’ll take a look at how we can publish and version our packages.

The basics of Swift Package Manager

Most of the code we write depends on external libraries. Libraries are pieces of code that can be used by many applications. The OS already comes with essential libraries we can use as building blocks, and all we have to do is import their modules. This is what we do when we need libraries like Foundation, SwiftUI, or UIKit. But what happens when we need to use a library that doesn’t come with the OS?

In this case, we can manually download the library and embed it in our project. This process gets complicated if we depend on multiple libraries, though. A library might also depend on other libraries, which means we would need to manually manage each sub dependency. Another problem we might face is dealing with versions. How do we know when to update a specific dependency?

Those problems are what make dependency managers exist. They automate those processes, making our lives simpler and allowing us to focus on writing code. SPM is Apple’s dependency manager and is part of the Swift project. It integrates with the Swift build system to provide us the full experience of downloading, compiling, linking, and updating dependencies. Xcode also integrates with it, exposing controls to use this tool.

Packages

SPM works by managing packages. A package is a flexible container of source code that can distribute libraries to clients. In this article, we’ll be using a simple open-source package called Time. More specifically, we’ll explore how we can use SPM to use this library in our code.

The examples in this article use Xcode 13.2.1. If you wish to follow along, create a new iOS project using Swift (the UI framework doesn’t matter).

Declaring Dependencies

To use a package in our iOS app, we first need to declare it as a dependency in the Package Dependencies screen:

  1. In the navigation area, select the project
  2. At the left bar, select the project again (not the target)
  3. At the top tab bar, select the Package Dependencies tab
The Package Dependencies screen on Xcode

Now we need to add the Time package:

  1. Copy the repository URL: https://github.com/davedelong/time.git
  2. Select the + button, under Packages
  3. Paste the copied URL in the search bar at the top
  4. In the dependency rule option, select “Up to Next Major Version”
Adding Time as a package

Xcode will then fetch this package and ask us which library we want to use (one package can distribute multiple libraries). This package is simple, it only distributes one:

Adding the Time product

Once we add this package to our project, Xcode will display it in the Package Dependencies list, in the navigation area:

The list of resolved packages in the navigation area

Package Resolution

After we declare the dependencies in our project, SPM will resolve them:

  1. Look at the URL and version of each package
  2. Fetch each dependency with the correct version
  3. Repeat this process for each sub dependency of a package if it has any
  4. Configure the packages with the project, allowing us to import their distributed libraries

After the package resolution phase, SPM generates a JSON file called Package.resolved. It contains which packages were resolved and what their versions are. SPM uses it to figure out whether a dependency needs to be updated or not. Here’s what this file looks like:

{
  "object": {
    "pins": [
      {
        "package": "Time",
        "repositoryURL": "https://github.com/davedelong/time.git",
        "state": {
          "branch": null,
          "revision": "be6cbbbb97aa4570e3b51bd56f98ca3cf62aa3cb",
          "version": "0.9.2"
        }
      }
    ]
  },
  "version": 1
}

Package.resolved is located in the swiftpm folder, inside your xcodeproj file:

SPM-Basics.xcodeproj/project.xcworkspace/xcshareddata/swiftpm/Package.resolved

It’s a good idea to put the swiftpm folder under version control. This way we can ensure every team member is using the right package versions.

Packages Location

The resolved packages are located in the derived data folder. A lot of times developers have problems with Xcode, and deleting this folder sometimes solves those issues. Just be aware that when you delete it, you’ll also delete the cached dependencies, forcing a new resolution of packages.

The Three SPM Actions

Once we have the packages in place, we can use three different actions for dealing with them:

Actions for dealing with SPM

Reset Package Caches

Use this action to erase the cached packages of our project from the derived data folder. SPM will automatically resolve the dependencies again.

Resolve Package Versions

Use this action to force a new resolution of dependencies. If your package.resolved file was updated by another team member, this action will ensure your local packages match the versions in that file.

Update to Latest Package Versions

The action name says it all. It will check if any dependency has available updates and will update them according to the dependency rule (e.g Up to next major). Semantic versioning is used to organize the package versions.

Be careful

Packages can come from third-party developers. Before using these packages, ensure the following:

  1. You understand what the package does and what sub dependencies it uses
  2. It comes from a trusted source
  3. If it’s an open-source package, ensure it’s maintained by the community (check the latest changes, number of stars, and so on)
  4. The package license allows your application to use it

Conclusion

In this article, we’ve explored how SPM works. Here’s what we learned:

  • What SPM and packages are
  • How to add packages to an Xcode project
  • What package resolution is
  • Where Xcode stores the resolved packages
  • How to manage the packages in Xcode
  • What to take into account when adding a package

In the upcoming article, we’ll explore how we can create a Swift package and what it looks like in terms of structure.